ubuntu@ubuntu8:~/linuxC$ sudo apt install exuberant-ctags
라이브러리를 설치하면 /usr/ 안에 설치됨 안을 살펴보면
ubuntu@ubuntu8:~/linuxC$ cd /usr/
ubuntu@ubuntu8:/usr$ ls
arm-linux-gnueabi  arm-linux-gnueabihf  bin  games  include  lib  lib32  lib64  libexec  libx32  local  sbin  share  src
구조체 자료형 변수 등도 다 include에 정의되어 있음.
ubuntu@ubuntu8:/usr$ cd include
ubuntu@ubuntu8:/usr/include$ ls
EGL          byteswap.h    expat_external.h  gnumake.h   misc        paths.h             re_comp.h    stdc-predef.h  ulimit.h
FlexLexer.h  c++           fcntl.h           grp.h       mntent.h    pcre.h              regex.h      stdint.h       unistd.h
GL           caca++.h      features.h        gshadow.h   monetary.h  pcre2.h             regexp.h     stdio.h        utime.h
GLES         caca.h        fenv.h            iconv.h     mqueue.h    pcre2posix.h        reglib       stdio_ext.h    utmp.h
GLES2        caca0.h       finclude          ifaddrs.h   mtd         pcre_scanner.h      resolv.h     stdlib.h       utmpx.h
GLES3        caca_conio.h  fmtmsg.h          inttypes.h  net         pcre_stringpiece.h  rpc          string.h       uuid
KHR          caca_types.h  fnmatch.h         iproute2    netash      pcrecpp.h           rpcsvc       strings.h      values.h
SDL          complex.h     fpu_control.h     langinfo.h  netatalk    pcrecpparg.h        sched.h      sudo_plugin.h  video
X11          cpio.h        fstab.h           lastlog.h   netax25     pcreposix.h         scsi         sys            wait.h
aio.h        crypt.h       fts.h             libgen.h    netdb.h     png.h               search.h     syscall.h      wchar.h
aliases.h    ctype.h       ftw.h             libintl.h   neteconet   pngconf.h           selinux      sysexits.h     wctype.h
alloca.h     dirent.h      gawkapi.h         libmount    netinet     pnglibconf.h        semaphore.h  syslog.h       wordexp.h
alsa         dlfcn.h       gcalc-2           libpng      netipx      poll.h              sepol        tar.h          x86_64-linux-gnu
ar.h         drm           gci-2             libpng16    netiucv     printf.h            setjmp.h     termio.h       xcb
argp.h       elf.h         gconv.h           limits.h    netpacket   proc_service.h      sgtty.h      termios.h      xen
argz.h       endian.h      getopt.h          link.h      netrom      protocols           shadow.h     tgmath.h       xorg
arpa         envz.h        gio-unix-2.0      linux       netrose     pthread.h           signal.h     thread_db.h    zconf.h
asm-generic  err.h         glib-2.0          locale.h    nfs         pty.h               slang.h      threads.h      zlib.h
asoundlib.h  errno.h       glob.h            malloc.h    nl_types.h  pulse               slcurses.h   time.h
assert.h     error.h       glvnd             math.h      nss.h       pwd.h               sound        ttyent.h
bits         execinfo.h    gnu               mcheck.h    obstack.h   python3.8           spawn.h      uchar.h
blkid        expat.h       gnu-versions.h    memory.h    openvpn     rdma                stab.h       ucontext.h
동적 라이브러리 파일을 리눅스에서는 so파일이라고함.
헤더파일에 모든 자료형이 정의되어 있기 때문에 여기서 태그를 만들어주겠음.
안에 있는 모든 헤더에 태그를 연결해주고 -R은 하위에 있는 모든 파일을 의미함.
ubuntu@ubuntu8:/usr/include$ sudo ctags -R
ubuntu@ubuntu8:/usr/include$ ls -l tags
-rw-r--r-- 1 root root 13776727  2월  2 11:36 tags
13MB 정도의 파일이 나옴.
이 파일을 vi나 vim에 연결시켜주는거임
이번에는 vim에 연결해보겠음.
먼저 vim을 깔고
sudo apt install vim
매번 :set nu :ts=4 이런것도 안해도 되게끔 만들어줄수 있음.
홈 디렉토리에서 실행해야함!!!
ubuntu@ubuntu8:~$ vi .vimrc
set number
set autoindent
set cindent
set smartindent
set shiftwidth=4
set ts=4
set tags+=/usr/include/tags
vi에서 외부명령을 실행하고 싶을떄는 :!를 치면 쉘 명령을 실행할수 있음.

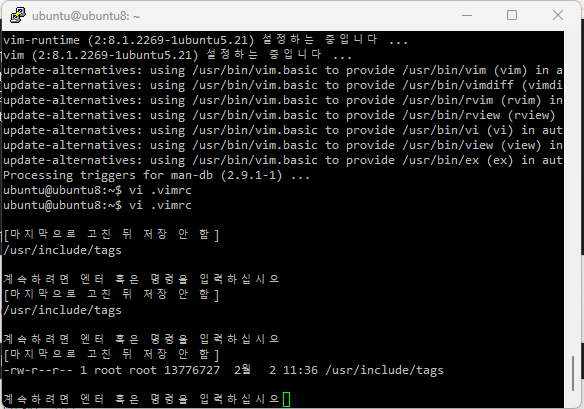
이제 저장하고 나가주고
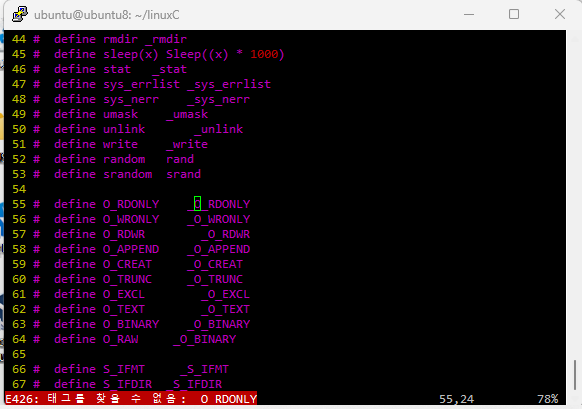
어제 썻던 코드 중에 BUFSIZ가 몇 바이트인지 모르겠는데 사용하는 경우가 이썽ㅆ다,.
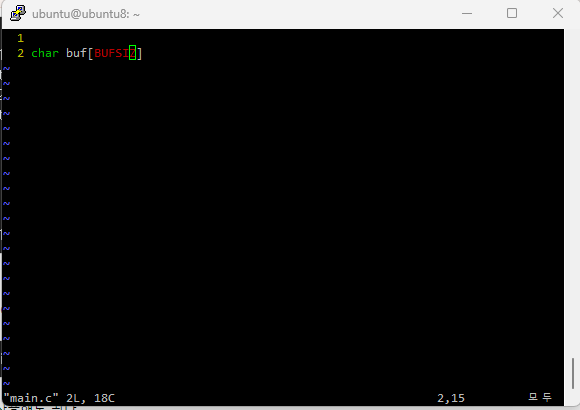
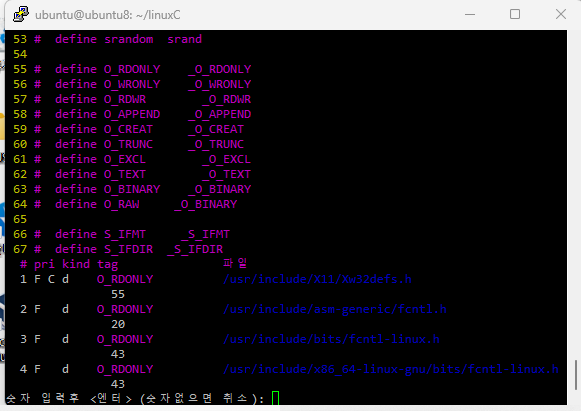
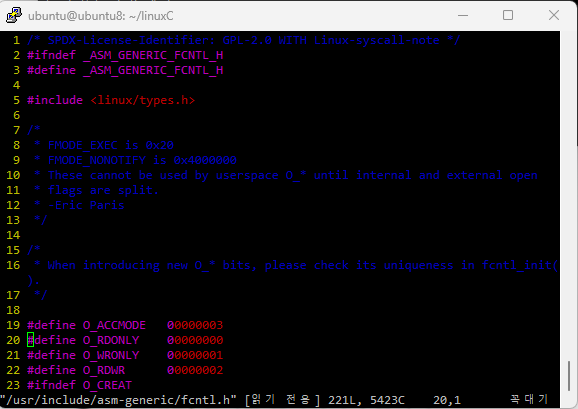
ctrl+] 를 누르면 링크됨.

ctrl+t를 누르면 다시 원래 코드로 돌아가짐.
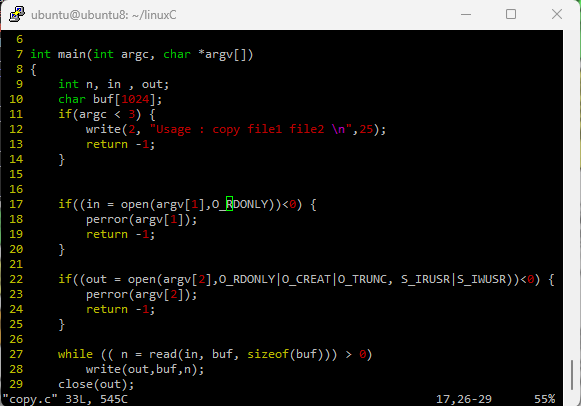
아래 코드 한번 작성하고
ubuntu@ubuntu8:~/linuxC$ cat copy.c
#include <unistd.h>
#include <fcntl.h>
#include <stdio.h>
#include <sys/stat.h>
#include <sys/types.h>

int main(int argc, char *argv[])
{
        int n, in , out;
        char buf[1024];
        if(argc < 3) {
                write(2, "Usage : copy file1 file2 \n",25);
                return -1;
        }


        if((in = open(argv[1],O_RDONLY))<0) {
                perror(argv[1]);
                return -1;
        }

        if((out = open(argv[2],O_RDONLY|O_CREAT|O_TRUNC, S_IRUSR|S_IWUSR))<0) {
                perror(argv[2]);
                return -1;
        }

        while (( n = read(in, buf, sizeof(buf))) > 0)
                write(out,buf,n);
        close(out);
        close(in);

        return 0;
}
gcc copy.c -o copy

gcc -o copy copy.c
둘 다 가
./copy로 실행해야함
copy로 실행할수 없는 이유는
ubuntu@ubuntu8:~/linuxC$ echo $PATH
/usr/local/sbin:/usr/local/bin:/usr/sbin:/usr/bin:/sbin:/bin:/usr/games:/usr/local/games:/snap/bin
이건 명령어가 실행되는 환경변수 저장 공간 위치를 나타내는거임.
저기로 잡혀있으니까 당연히 저위치엔 copy가 없음. 당연히 실행이 안됨!!
어떠한 명령어가 어디에 들어있는지 확인을 위해서는 which 명령어를 사용
ubuntu@ubuntu8:~/linuxC$ which cp
/usr/bin/cp
실행하려면 arc(argument count)가 3개여야 가능하다.
고로 명령어는 아래처럼 쳐주면 되겠다.
./copy copy.c copy1.c 각각이 1개씩 count 되는거고 각각이 argv[0], argv[1], argv[2]가 되는거임.
ubuntu@ubuntu8:~/linuxC$ ./copy copy.c copy1.c
ubuntu@ubuntu8:~/linuxC$ ls
copy  copy.c  copy1.c
argv의 각각의 값은 메모리에 저장이 되는거고 확인을 하고 싶다면
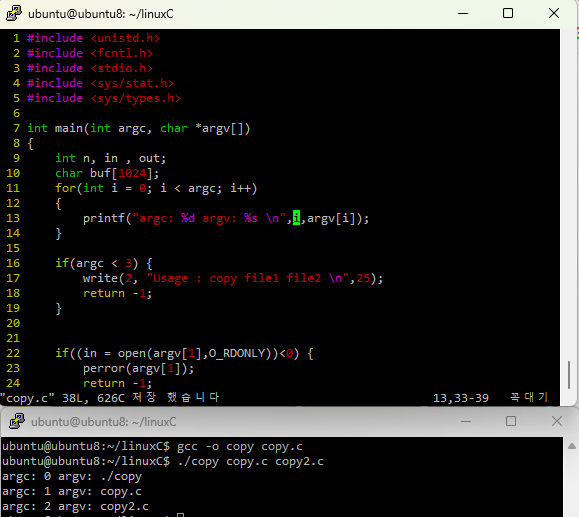
한 글자(char)단위로 출력하고 싶다면 아래처럼 하면 된다.
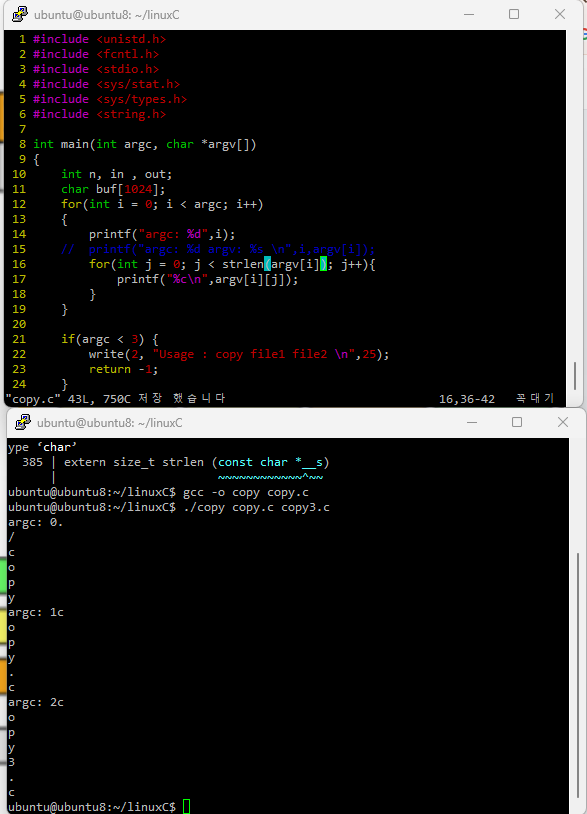
man 2 printf 는 터미널에서 사용하는 명령
man 3 printf를 터미널에서 쳐보면 stdio.h의 표준입출력 함수인 printf를 볼 수 있음.
code의 stdio.h를 주석처리하고 다시 컴파일 해보고 에러가 발생함
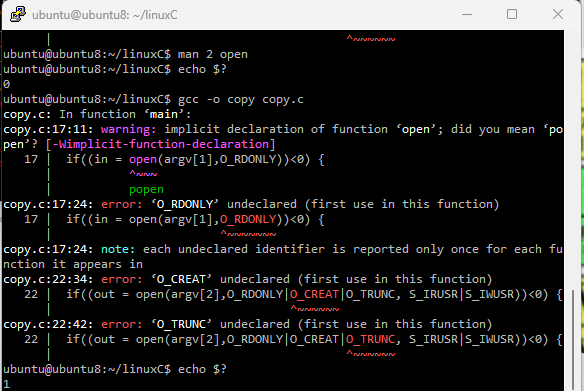
오류가 나면 제일 위의 에러를 찾아보고 수정해줌.
man page를 활용해서 에러를 찾으면 빠르다.
man 2 open

저 3개의 헤더파일이 필요하다는 뜻임.
그 중 fcntl.h이 없으니 다시 주석해제 해주면 됨.
다시 컴파일 해보면 잘 되는걸 확인할 수 있음.
'Linux BSP' 카테고리의 다른 글
| [Linux BSP] U-Boot Bootloader 빌드(ubuntu 호스트 크로스 컴파일) (0) | 2024.02.07 |
|---|---|
| [LINUX] LINUX 기초 상식 (0) | 2024.02.02 |
| [Linux] Linux 명령어 (0) | 2024.02.01 |
| [Linux BSP] Linux 교차 개발 환경 세팅하기 (1) | 2024.01.31 |
| [Linux BSP] NFS 서버 설치해서 우분투-라즈베리파이 공유폴더 사용하기 (0) | 2024.01.31 |


