반응형
입력 신호 r, 감마보정 값 γ, 출력 신호 s


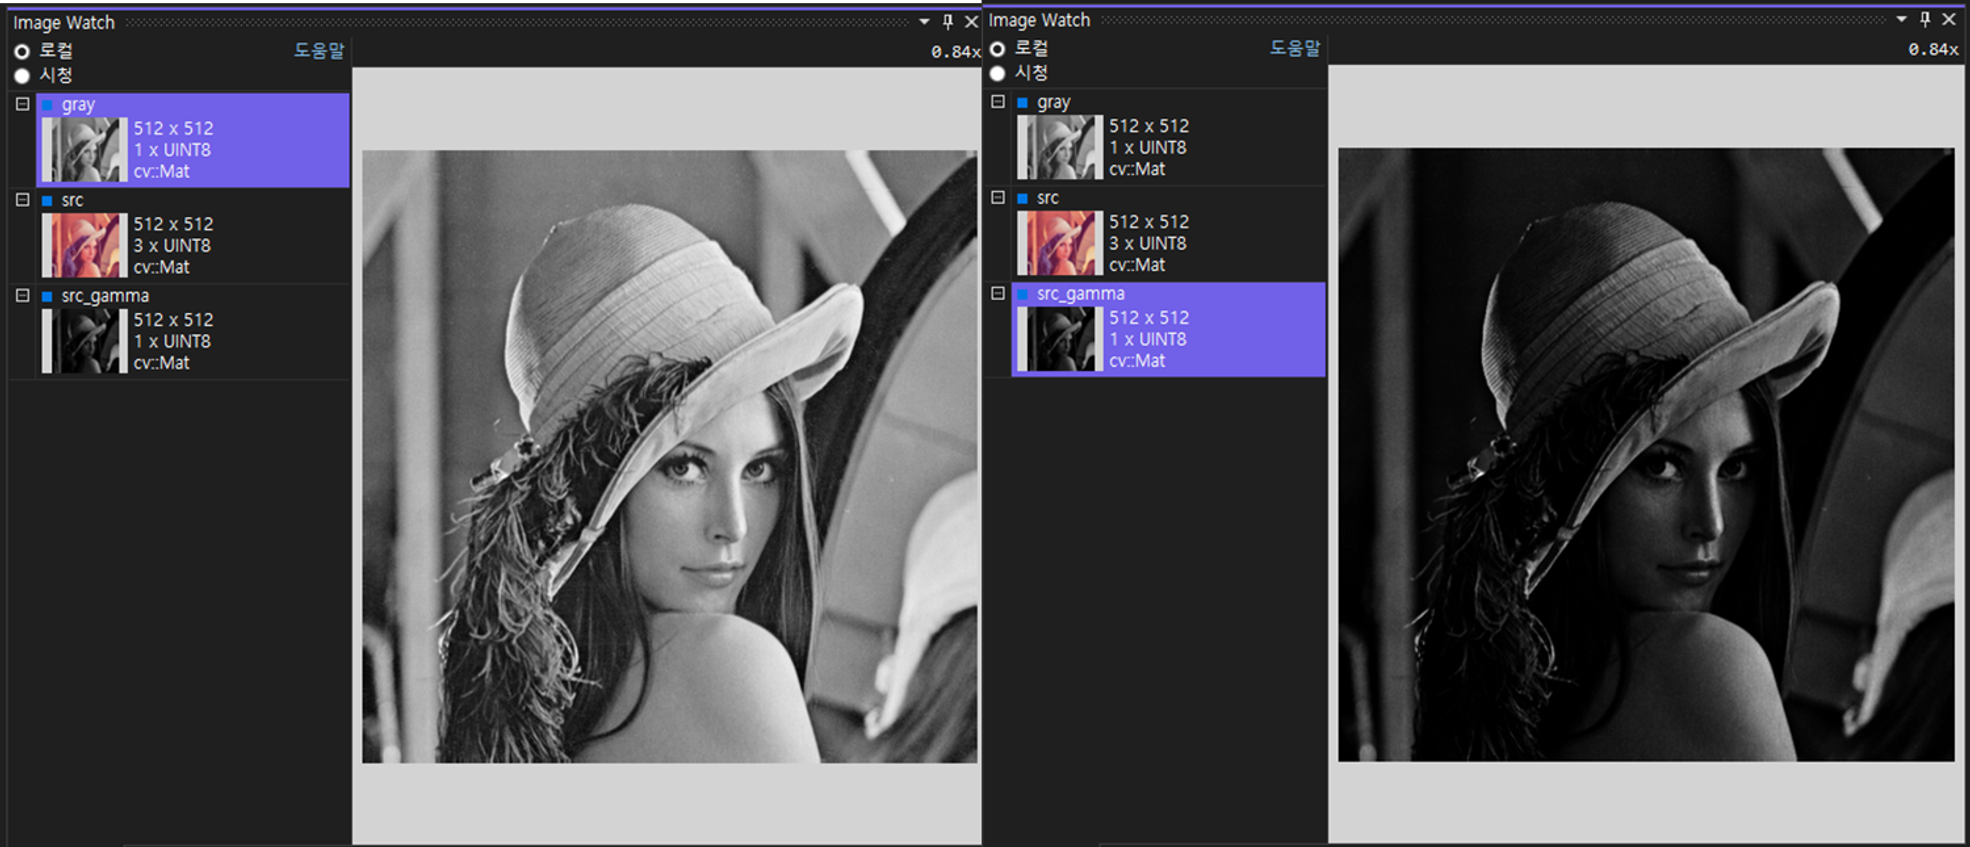
만약 어두운 걸(0.2에 해당하는 정보정도) 밝게 하고 싶다면 gamma=1에서 0.4로 바꾸면 출력이 0.55정도로 늘어나게됨.
밝고 어두운 정보를 조절함에 있어 포화가 되지 않는 것이 장점(0.3정도의 감마값까지 그 이하는 빡셈)

여기까지가 이론이고
//ISP.h
#pragma once

#include "Common.h"

class ISP
{
public:
	ISP();
	~ISP();

	bool Convert_BGR2GRAY(
		uchar* pBGR,//color channel, input
		int cols,//cols, input
		int rows,//rows, input
		uchar* pGray//mono channel, output
	);

	bool Get_Histogram(
		uchar * pGray,
		int cols,
		int rows,
		int* pHisto,
		int histoSz
	);
	bool Enhance_HistogramEq(
		uchar* pGray,
		int cols,//cols, input
		int rows,//rows, input
		uchar* pGrayEq
	);

private:

};
아래는 직접 짠 코드
#include "ISP.h"

ISP::ISP()
{
	std::cout << "ISP::Ctor" << std::endl;
}

ISP::~ISP()
{
	std::cout << "ISP::Dtor" << std::endl;
}

bool ISP::Convert_BGR2GRAY(uchar* pBGR, int cols, int rows, uchar* pGray)
{
	if (pBGR == nullptr || pGray == nullptr)
	{
		return false;
	}

	//이렇게 짜면 아래에 비해 performance가 매우 향상됨
	Mat src = Mat(rows, cols, CV_8UC3, pBGR);//color니까 3채널
	Mat gray_cv = Mat(rows, cols, CV_8UC1, pGray);//color니까 3채널
	cvtColor(src, gray_cv, COLOR_BGR2GRAY);
	return true;

	/*
	for (size_t row = 0; row < rows; row++)
	{
		for (size_t col = 0; col < cols; col++)
		{
			int index = (row)*cols + (col);
			int val_Y =
				0.299 * pBGR[index * 3 + 2]//r
				+ 0.587 * pBGR[index * 3 + 1]//g
				+ 0.114 * pBGR[index * 3 + 0];//b
			pGray[index] = (uchar)(val_Y + 0.5);//올림을 하고 형변환해줘서 오차 최소화

		}
	}
	return true;
	*/
}


bool ISP::Get_Histogram(uchar* pGray, int cols, int rows,int*pHisto, int histoSz)
{
	if (pGray == nullptr || pHisto == nullptr)//pGray나 pHisto가 뭔가를 가리키고 있지 않다면
	{
		return false;// false
	}


	for (size_t i = 0; i < cols*rows; i++)
	{
		if (pGray[i] >= histoSz)continue;//size 256을 넘는다면 패스 histogram이 터지지 않게 조건 걸어줌
		pHisto[pGray[i]]++;//안넘는다면 histo 값 증가
	}


	return true;
}


//밝은 곳과 어두운 곳의 contrast가 기존에는 180이라면 enhancement 후에는 200정도로 늘어남
bool ISP::Enhance_HistogramEq(uchar* pGray,int cols,int rows,uchar* pGrayEq)
{
	if (pGray == nullptr || pGrayEq == nullptr)//pGray나 pGrayEq가 뭔가를 가리키고 있지 않다면
	{
		return false;// false
	}
	int length = rows * cols;
	const int histoSz = 256;
	int histo[histoSz] = { 0, };

	Get_Histogram(pGray, cols, rows, histo, 256);

	//확률 밀도 함수
	int acc[histoSz] = { 0, };
	//acc[0]=histo[0]+histo[i] 를 프로그램으로 구현해야함
	acc[0] = histo[0];
	for (size_t i = 1; i < histoSz; i++)
	{
		acc[i] = acc[i - 1] + histo[i];//이전 확률밀도함수 값에다가 histo값 더해줌.
	}

	//new look up table 생성... 영상의 각 화소 값들을 새로운 대응값으로 맵핑
	int new_Gray[histoSz] = { 0, };
	for (size_t i = 1; i < histoSz; i++)
	{
		new_Gray[i] = static_cast<int>(1.0 * acc[i] * 255 / length);//이전 확률밀도함수 값에다가 histo값 더해줌.
	}


	for (size_t i = 1; i < length; i++)
	{
		pGrayEq[i] = new_Gray[pGray[i]]; //계산완료된 값들 Equalization 히스토그램에 맵핑시켜줌
	}


	//=======csv excel 파일 생성
	std::ofstream ofile("histogram_eq.csv");

	std::string str = "brightness, histo, histo_eq";//제일 윗열에 index 세팅
	ofile << str << "\n";//위에 string 이랑 개행 파일에 넣어줌
	if (ofile.is_open()) {
		for (size_t i = 0; i < histoSz; i++)
		{
			str = std::format("{}, {}, {}\n", i, histo[i], pGrayEq[i]);
			ofile << str;
		}
		ofile.close();
	}
	//=======csv excel 파일 생성

	return true;


}
아래는 최적화된 코드
//07.ISP_gammacorrection.cpp
#pragma once

#include "ISP.h"

int main()
{
	std::string fileName = "../thirdparty/opencv_480/sources/samples/data/lena.jpg";
	cv::Mat src = cv::imread(fileName, cv::ImreadModes::IMREAD_ANYCOLOR);
	cv::Mat gray = cv::Mat(src.rows, src.cols, CV_8UC1);
	int length = src.total();//data length=cols*rows
	//int channels = src.channels();

	ISP _isp;
	double gamma = 0.4;
	Mat src_gamma = Mat(src.size(), CV_8UC1);

	//Gray Input
	_isp.Convert_BGR2GRAY(src.data, src.cols, src.rows, gray.data);

	//Gamma Correction
	for (size_t i = 0; i < length; i++)
	{
		double normalized_value = (double)gray.data[i] / 255.0;
		src_gamma.data[i] = static_cast<uchar>
			(std::pow(gray.data[i] / 255.0, gamma) * 255.0 + 0.5);
	}

	//Gray Output

	return 1;
}


반응형
'Open CV' 카테고리의 다른 글
| [OPENCV-C++ ] 손실된 데이터 복원하기(보간법(Interpolation) 활용) (0) | 2023.11.26 |
|---|---|
| [OPENCV-C++ ] blurring (0) | 2023.11.26 |
| [OPENCV-C++ ] histogram equalization (0) | 2023.11.07 |
| [OPENCV-C++ ] 영상인식에서 사용하는 색상 모델 (1) | 2023.11.06 |
| [OPENCV-C++ ] HSV threshold 활용해서 원하는 부분만 추출하기 (0) | 2023.11.06 |


